


Was asked about this so here are a series of photos that hopefully should explain the process. I am sure there might be other (better?) websites and videos out there.
I have deliberately used larger wire than you might normally and used two different colours to make it clearer.
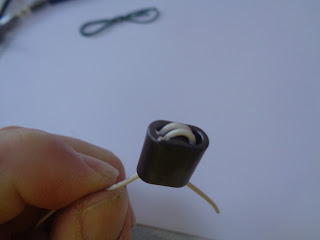
The torroid, doesn't matter what type it is the principals are the same.

I didn't show the stage but sometimes the torroid has small sharp edges. If you are using wire that is effected (you will find out if you are) then the easiest option is to use a circular needle file and make sure the hole edges are rounded (just slightly you do not want to file away the torroid!)
 Turn one. Pass the wire up through one side and back down through the other. That is ONE TURN.
 Pull it tight.
 Repeat for however many turns you need.
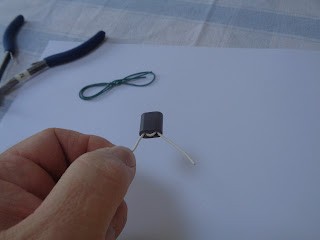 The free wire end
 The other side of the transformer, you can start on the same side or the opposite side, most transformers in PA stages, ATU, the X-Phase eliminator etc prefer them starting on the other side.
 Same process... through one side and back down through the other...
 Pull tight... that is ONE TURN
 Repeat as needed.


That's it. In this case a 2T:2T transformer, if you need a different number of turns wind a different number of times.

There are lots of other possible winding options the other frequently seen option is for a bi-filar or tri-filar winding. Simply take the wires and wind two or three of them together FIRST and then wind them through the torroid.
I note a lot of chinese ebay projects seem to use power feed line chokes often using a single winding with these binocular cores.
VSWR bridges sometimes use winding's about the outside of the torroid. You will find examples of these on this blog too.
You might see the winding's also using hardline, coax braid or even solid brass tubes and PCB ends soldered on but the photos above are for the wire version the X-Phase QRM eliminator uses. It has 2t:8t so two tuns on one side and 8 turns on the other. Here is a photo of mine as I fitted it.

I have deliberately used larger wire than you might normally and used two different colours to make it clearer.
The torroid, doesn't matter what type it is the principals are the same.

I didn't show the stage but sometimes the torroid has small sharp edges. If you are using wire that is effected (you will find out if you are) then the easiest option is to use a circular needle file and make sure the hole edges are rounded (just slightly you do not want to file away the torroid!)


That's it. In this case a 2T:2T transformer, if you need a different number of turns wind a different number of times.

There are lots of other possible winding options the other frequently seen option is for a bi-filar or tri-filar winding. Simply take the wires and wind two or three of them together FIRST and then wind them through the torroid.
I note a lot of chinese ebay projects seem to use power feed line chokes often using a single winding with these binocular cores.
VSWR bridges sometimes use winding's about the outside of the torroid. You will find examples of these on this blog too.
You might see the winding's also using hardline, coax braid or even solid brass tubes and PCB ends soldered on but the photos above are for the wire version the X-Phase QRM eliminator uses. It has 2t:8t so two tuns on one side and 8 turns on the other. Here is a photo of mine as I fitted it.


No comments:
Post a Comment